Body Kit Painting: Achieving a Professional Finish

Get a professional-looking finish with our guide to body kit painting. We cover preparation, priming, and painting techniques. Achieve a flawless, durable finish that complements your car's color.
Why Professional Body Kit Painting Matters
So, you've got your shiny new body kit. Awesome! But slapping it on your car unpainted is like serving a gourmet meal on a paper plate – it just doesn't do it justice. A professional-quality paint job isn't just about aesthetics; it's about protecting your investment and ensuring a long-lasting, flawless look.
Think about it: the elements are harsh. Sun, rain, road debris – they all take a toll. A proper paint job acts as a shield, preventing rust, chipping, and fading. Plus, a well-painted body kit seamlessly integrates with your car's existing paint, making it look like it came straight from the factory (or even better!).
The Body Kit Painting Process: A Detailed Breakdown
Painting a body kit isn't as simple as grabbing a can of spray paint and going to town. It's a multi-step process that requires patience, attention to detail, and the right tools and materials. Let's break it down:
Step 1: Preparation is Key
This is arguably the most crucial step. A poorly prepared surface will lead to paint adhesion issues, uneven finishes, and ultimately, a disappointing result. Here's what you need to do:
- Cleaning: Thoroughly clean the body kit with soap and water to remove any dirt, grease, or wax. Use a degreaser for stubborn areas.
- Sanding: Sand the entire surface of the body kit with progressively finer grits of sandpaper. Start with a coarser grit (e.g., 180-grit) to remove imperfections and then move to finer grits (e.g., 320-grit, 400-grit) to create a smooth surface for primer.
- Filling Imperfections: If there are any dents, scratches, or imperfections, use body filler to fill them in. Sand the filler smooth once it's dry.
- Wiping Down: After sanding, wipe down the body kit with a tack cloth to remove any dust or debris.
Step 2: Priming for Success
Primer is the foundation for your paint job. It provides a uniform surface for the paint to adhere to, helps to hide imperfections, and improves the overall durability of the finish. Choose a high-quality automotive primer that is compatible with the material of your body kit (fiberglass, polyurethane, etc.).
- Applying Primer: Apply several thin coats of primer, allowing each coat to dry completely before applying the next. Follow the manufacturer's instructions for drying times.
- Sanding Primer: Once the primer is dry, sand it lightly with fine-grit sandpaper (e.g., 400-grit, 600-grit) to create an even smoother surface.
- Cleaning Again: Wipe down the primed body kit with a tack cloth to remove any dust or debris.
Step 3: Painting Like a Pro
Now for the fun part! Choose a high-quality automotive paint that matches your car's color. You'll also need clear coat to protect the paint and give it a glossy finish.
- Applying Base Coat: Apply several thin coats of base coat, allowing each coat to dry completely before applying the next. Follow the manufacturer's instructions for drying times and number of coats.
- Applying Clear Coat: Apply several thin coats of clear coat, allowing each coat to dry completely before applying the next. This is what gives your paint that deep, glossy shine.
Step 4: Finishing Touches
Once the clear coat is dry, you can further enhance the finish with polishing and waxing.
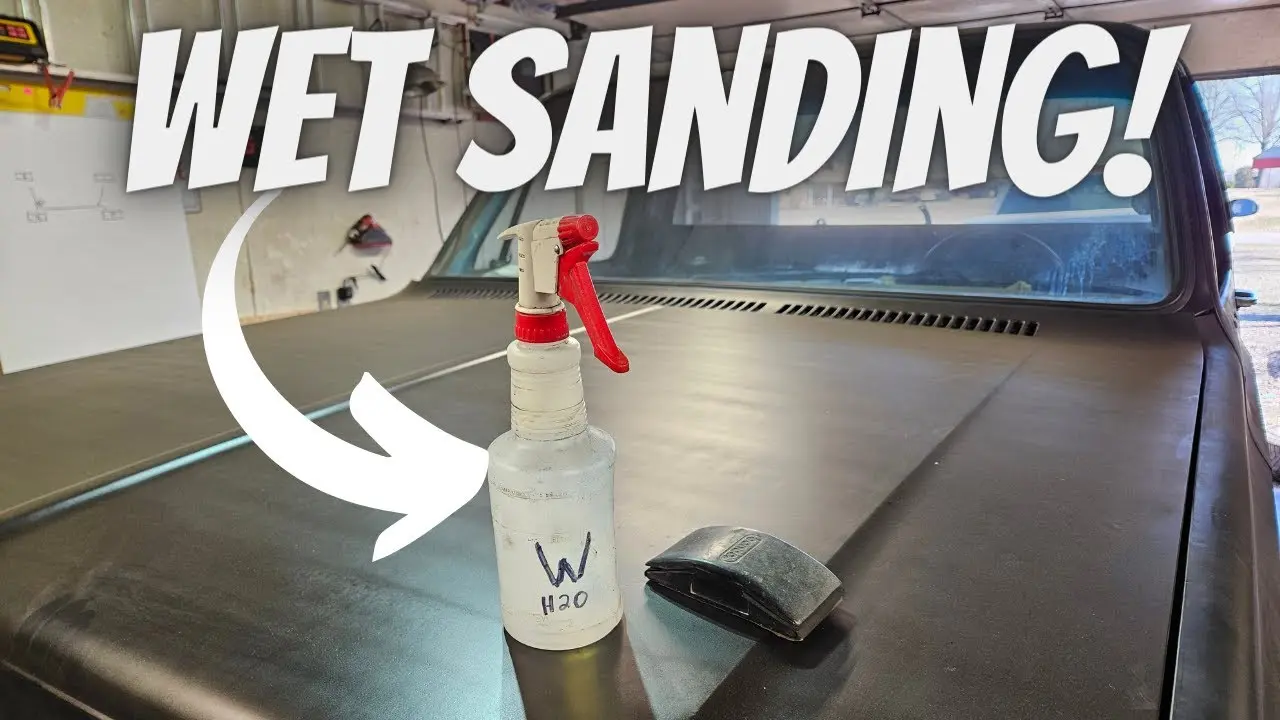
- Wet Sanding (Optional): If there are any imperfections in the clear coat (e.g., orange peel), you can wet sand it with very fine-grit sandpaper (e.g., 2000-grit, 3000-grit) to smooth it out.
- Polishing: Use a polishing compound and a polishing pad to remove any swirl marks or scratches from the clear coat.
- Waxing: Apply a coat of wax to protect the paint and give it an even deeper shine.
Product Recommendations: Body Kit Painting Essentials
Okay, time to talk specifics. Here are some products that can help you achieve a professional-looking finish on your body kit:
Primers: Setting the Stage for Success
- SEM High Build Primer: This is a fantastic all-around primer that works well on a variety of materials. It's easy to sand and provides excellent adhesion. Expect to pay around $30-$40 per can. Usage Scenario: Ideal for filling minor imperfections and creating a smooth base for paint on polyurethane or fiberglass body kits.
- Dupli-Color Self-Etching Primer: If you're working with metal body panels, this primer is a must. It etches into the metal, providing superior adhesion and preventing rust. Price range: $15-$25 per can. Usage Scenario: Essential for priming metal body panels to ensure long-lasting paint adhesion and rust prevention.
Paints: Color and Clarity
- AutomotiveTouchup Paint: This company offers custom-matched automotive paint in aerosol cans, touch-up bottles, and larger quantities for spray guns. They can match virtually any OEM color. Cost varies depending on the color and quantity, but expect to pay around $20-$30 per aerosol can. Usage Scenario: Perfect for achieving an exact color match to your car's factory finish, ensuring seamless integration of the body kit.
- House of Kolor: For those looking for truly custom and eye-catching colors, House of Kolor is the way to go. They offer a wide range of vibrant colors, pearls, and metallics. Prices are higher than OEM-matched paints, but the results are stunning. Expect to pay $50+ per pint. Usage Scenario: Ideal for creating a unique and personalized look with vibrant, custom colors and effects on your body kit.
Clear Coats: Protection and Shine
- Spraymax 2K Clear Coat: This is a two-component clear coat in an aerosol can that provides a durable, glossy finish. It's resistant to scratches, UV damage, and chemicals. Price: $30-$40 per can. Usage Scenario: Provides a durable and glossy finish that protects the paint from scratches, UV damage, and chemicals, ensuring a long-lasting and professional-looking result.
- USC Spray Max 2K Glamour High Gloss Aerosol Clear Coat: Another excellent 2K clear coat option, known for its ease of use and high-gloss finish. A great choice for DIYers. Price around $35-$45. Usage Scenario: Easy to apply and delivers a high-gloss finish, making it a great choice for DIYers looking for professional-quality results.
Tools: The Right Equipment for the Job
- 3M Sandpaper Assortment Pack: A variety of sandpaper grits is essential for proper surface preparation. A pack like this will provide you with everything you need. Cost: $15-$25.
- Tack Cloths: These are essential for removing dust and debris from the surface before painting. A pack of tack cloths is relatively inexpensive. Price: $5-$10.
- Spray Gun (Optional): If you're serious about painting, a spray gun will provide a more even and consistent finish than aerosol cans. A decent entry-level spray gun will cost around $100-$200.
Comparing Products: Making the Right Choice for Your Project
Choosing the right products can feel overwhelming, so let's compare some of the options:
Aerosol Can vs. Spray Gun
Aerosol cans are convenient and easy to use, making them a good option for smaller projects or for those who are new to painting. However, they don't offer the same level of control or consistency as a spray gun. Spray guns require more skill and experience, but they can produce a superior finish. If you're painting a large body kit or want the best possible results, a spray gun is the way to go.
One-Component vs. Two-Component Clear Coat
One-component clear coats are easier to use, but they're not as durable or resistant to chemicals as two-component clear coats. Two-component clear coats require mixing an activator with the clear coat, which can be a bit more complicated, but they provide a much tougher and more durable finish. For body kits, a two-component clear coat is generally recommended.
Budget vs. Premium Paints
Budget-friendly paints can be a good option for those on a tight budget, but they may not offer the same level of color accuracy, durability, or UV resistance as premium paints. Premium paints will generally last longer and look better over time. If you want the best possible results, it's worth investing in high-quality paint.
Troubleshooting Common Body Kit Painting Problems
Even with careful preparation and the right products, things can still go wrong. Here are some common problems and how to fix them:
- Orange Peel: This is a textured finish that looks like the skin of an orange. It's usually caused by spraying too much paint at once or by using the wrong spray gun settings. To fix it, wet sand the clear coat with fine-grit sandpaper and then polish it.
- Runs and Sags: These are caused by applying too much paint in one area. To fix them, let the paint dry completely and then sand them down with fine-grit sandpaper. Reapply the paint in thin coats.
- Fish Eyes: These are small, circular craters in the paint. They're usually caused by contamination on the surface. To fix them, clean the surface thoroughly with a degreaser and then reapply the paint.
- Paint Peeling: This is usually caused by poor surface preparation or using the wrong primer. To fix it, remove the peeling paint, prepare the surface properly, and then reapply the primer and paint.
Safety First: Protecting Yourself While Painting
Painting can be hazardous if you don't take the proper precautions. Always wear a respirator to protect yourself from inhaling paint fumes. Wear gloves to protect your skin from paint and chemicals. Work in a well-ventilated area to prevent the buildup of fumes. And always follow the manufacturer's instructions for all products.
So, Are You Ready to Transform Your Ride?
Painting your body kit is a rewarding project that can dramatically improve the look of your car. By following these steps and using the right products, you can achieve a professional-looking finish that will turn heads. Now get out there and make your car look amazing!
:max_bytes(150000):strip_icc()/277019-baked-pork-chops-with-cream-of-mushroom-soup-DDMFS-beauty-4x3-BG-7505-5762b731cf30447d9cbbbbbf387beafa.jpg)


