DIY Car Wrap Installation: A Comprehensive Guide
Save money and learn how to wrap your car yourself. This comprehensive guide provides step-by-step instructions. Master the techniques for a smooth and professional-looking wrap.
Understanding Car Wrap Materials for DIY Installation
Okay, so you're thinking about wrapping your car yourself? Awesome! It's a big project, but totally doable with the right prep and knowledge. First things first, let's talk materials. You can't just slap any old vinyl on your ride and expect it to look good. There are tons of different types of vinyl wraps out there, and choosing the right one is key to a successful DIY installation. Think of it like picking the right paint for your walls – you wouldn't use bathroom paint in your living room, right?
The main things you'll want to consider are the type of vinyl (cast or calendared), the finish (gloss, matte, satin, etc.), the thickness, and the brand. Cast vinyl is generally more expensive, but it's thinner, more conformable, and lasts longer. Calendared vinyl is cheaper, but it's also thicker and less flexible, making it harder to work with, especially on complex curves. For a DIY project, especially your first one, cast vinyl is usually the way to go. It's more forgiving.
Product Recommendations:
- 3M 1080/2080 Series: This is a super popular choice for a reason. It's a cast vinyl that's easy to work with, comes in a ton of colors and finishes, and has excellent durability. Expect to pay around $15-$25 per foot, depending on the color and finish.
- Avery Dennison SW900 Series: Another top-notch cast vinyl option. Similar to 3M in terms of quality and ease of use. Prices are generally in the same ballpark as 3M.
- Vvivid Vinyl: If you're on a tighter budget, Vvivid offers some decent calendared vinyl options. They're not as easy to work with as cast vinyl, but they're a good option for simpler projects or practicing. Prices are significantly lower, around $8-$15 per foot.
Essential Tools and Equipment for Car Wrapping DIY
Alright, you've got your vinyl picked out. Now it's time to gather your tools. Trying to wrap a car without the right tools is like trying to bake a cake without an oven – it's just not gonna happen. Here's a rundown of the essential tools you'll need:
- Heat Gun: This is a MUST. You'll use it to soften the vinyl and make it more conformable to curves and contours. Don't go too cheap on this one – a good heat gun will have adjustable temperature settings.
- Squeegee: You'll use this to smooth out the vinyl and remove air bubbles. Get a good quality squeegee with a felt edge to prevent scratching the vinyl.
- Cutting Knife: For trimming the vinyl around edges and corners. Use a sharp blade and be careful not to cut into the paint!
- Masking Tape: To hold the vinyl in place while you're working.
- Microfiber Towels: For cleaning the car before wrapping.
- Isopropyl Alcohol: To remove any remaining dirt or grease.
- Gloves: To protect your hands from the vinyl and cleaning solutions.
- Measuring Tape: To measure the panels you're wrapping.
- Application Fluid (Slip Solution): This helps the vinyl slide around and prevents it from sticking prematurely. You can buy a pre-made solution or make your own with water and a few drops of dish soap.
Product Recommendations:
- Wagner HT1000 Heat Gun: A reliable and affordable heat gun with adjustable temperature settings. Around $30-$40.
- Lil Chizler Squeegee: A popular and durable squeegee with a felt edge. Around $10-$15.
- Olfa SK-4 Self-Retracting Safety Knife: A safe and sharp knife for trimming vinyl. Around $10-$15.
Preparing Your Car for Vinyl Wrap Installation DIY
This is arguably the most important step. A clean and smooth surface is essential for a successful wrap. Think of it like painting – you wouldn't paint over dirt and grime, would you? The same goes for wrapping. Start by washing your car thoroughly with soap and water. Then, use a clay bar to remove any embedded contaminants. Finally, wipe down the entire car with isopropyl alcohol to remove any remaining dirt or grease.
Pay special attention to edges, corners, and crevices. These are areas where the vinyl is most likely to lift or peel. You may also want to remove any badges, emblems, or trim pieces that could get in the way. If you can't remove them, you'll need to carefully trim the vinyl around them.
Scenario: Imagine you're wrapping a Honda Civic. You'll want to remove the Honda emblems on the trunk and hood. You can usually do this with some fishing line and a heat gun. Heat up the emblem slightly to soften the adhesive, then use the fishing line to gently saw through the adhesive. Once the emblem is removed, clean the area with adhesive remover to remove any remaining residue.
Step-by-Step Guide to DIY Car Wrapping
Okay, the moment of truth! Here's a step-by-step guide to wrapping your car:
- Measure and Cut the Vinyl: Measure the panel you're wrapping and cut a piece of vinyl that's slightly larger than the panel. This will give you some extra material to work with.
- Position the Vinyl: Carefully position the vinyl on the panel. Use masking tape to hold it in place.
- Apply Application Fluid: Spray the panel and the back of the vinyl with application fluid. This will allow the vinyl to slide around and prevent it from sticking prematurely.
- Squeegee the Vinyl: Starting from the center of the panel, use the squeegee to smooth out the vinyl and remove air bubbles. Work your way outwards, overlapping each stroke.
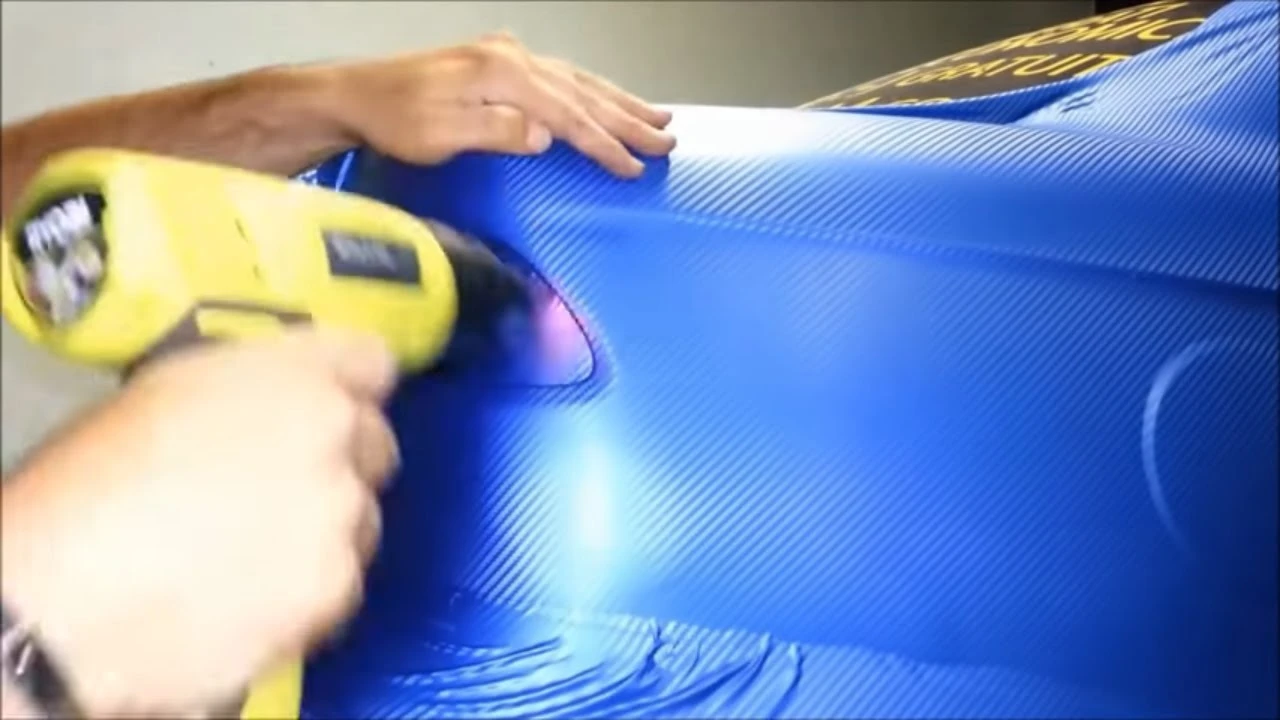
- Heat the Vinyl: Use the heat gun to soften the vinyl and make it more conformable to curves and contours. Be careful not to overheat the vinyl, as this can damage it.
- Trim the Vinyl: Use the cutting knife to trim the vinyl around edges and corners. Be careful not to cut into the paint!
- Post-Heat the Vinyl: Once you've trimmed the vinyl, use the heat gun to post-heat it. This will help the vinyl adhere to the surface and prevent it from lifting.
- Repeat: Repeat steps 1-7 for each panel.
Tips and Tricks:
- Work in a clean and well-lit area.
- Take your time. Rushing will only lead to mistakes.
- Don't be afraid to ask for help. Wrapping a car is a big project, and it's always helpful to have an extra set of hands.
- Watch videos. There are tons of great DIY car wrapping tutorials on YouTube.
- Practice on a smaller panel first. This will give you a feel for the process before you tackle the larger panels.
Dealing with Air Bubbles and Wrinkles During DIY Wrap
Air bubbles and wrinkles are inevitable, especially when you're first starting out. Don't panic! Here's how to deal with them:
- Air Bubbles: If you have a small air bubble, you can usually pop it with a pin and then smooth out the vinyl with your squeegee. For larger air bubbles, you may need to lift the vinyl and re-squeegee the area.
- Wrinkles: Wrinkles are usually caused by stretching the vinyl too much. To remove a wrinkle, heat the vinyl with your heat gun and then gently stretch it back into shape. You may need to lift the vinyl and re-squeegee the area.
Troubleshooting:
- Vinyl Lifting: If the vinyl is lifting around the edges, make sure you've cleaned the surface properly and that you're using enough heat. You may also need to use a primer to help the vinyl adhere to the surface.
- Vinyl Tearing: If the vinyl is tearing, you're probably stretching it too much. Try using less heat and working more slowly.
- Vinyl Not Sticking: If the vinyl isn't sticking, make sure you're using enough application fluid and that you're squeegeeing it properly. You may also need to use a primer to help the vinyl adhere to the surface.
Car Wrap Aftercare and Maintenance for DIY Projects
You've wrapped your car! Congrats! But the job's not over yet. Proper aftercare and maintenance are essential to keep your wrap looking its best. Here are some tips:
- Wait 24-48 Hours Before Washing: This will give the adhesive time to fully cure.
- Hand Wash Your Car: Avoid automatic car washes, as they can damage the vinyl. Use a mild soap and a soft sponge or microfiber towel.
- Avoid Abrasive Cleaners: Don't use abrasive cleaners, polishes, or waxes on your wrap. These can damage the vinyl.
- Remove Bird Droppings and Bugs Immediately: These can stain the vinyl if left on for too long.
- Park in the Shade: Prolonged exposure to sunlight can fade the vinyl.
- Consider a Ceramic Coating: A ceramic coating can help protect your wrap from UV damage and make it easier to clean.
Cost Analysis of DIY Car Wrapping vs Professional Installation
One of the biggest reasons people choose to DIY car wrap is the cost savings. But how much can you really save? Let's break it down:
DIY Car Wrap Costs:
- Vinyl: $200 - $1000 (depending on the size of your car and the type of vinyl)
- Tools: $50 - $200 (heat gun, squeegee, knife, etc.)
- Cleaning Supplies: $20 - $50 (soap, alcohol, clay bar, etc.)
Total DIY Cost: $270 - $1250
Professional Car Wrap Costs:
Professional car wraps typically cost between $2500 and $5000, depending on the size of your car, the type of vinyl, and the complexity of the design.
Savings: By wrapping your car yourself, you can save anywhere from $1230 to $3750!
Considerations: While DIY car wrapping can save you a lot of money, it's important to remember that it's also a lot of work. It requires patience, skill, and attention to detail. If you're not comfortable working with your hands or if you don't have the time to do it properly, then it's probably best to leave it to the professionals.
Potential Challenges and How to Overcome Them in DIY Wrapping
DIY car wrapping isn't always a walk in the park. You're bound to encounter some challenges along the way. Here are some common problems and how to overcome them:
- Difficult Curves: Wrapping around complex curves can be tricky. Use plenty of heat and stretch the vinyl slowly and carefully. You may also need to use relief cuts to allow the vinyl to conform to the shape.
- Air Bubbles: As mentioned earlier, air bubbles are inevitable. Use a pin to pop them and then smooth out the vinyl with your squeegee.
- Wrinkles: Wrinkles are usually caused by stretching the vinyl too much. Use less heat and work more slowly.
- Tears: If the vinyl tears, you'll need to start over with a new piece. Be careful not to stretch the vinyl too much.
- Adhesive Failure: If the vinyl isn't sticking properly, make sure you've cleaned the surface thoroughly and that you're using enough heat. You may also need to use a primer.
Learning Resources: Don't be afraid to consult online resources and forums for help. There are tons of experienced car wrappers out there who are willing to share their knowledge and expertise.
Is DIY Car Wrapping Right for You? Assessing Your Skills
So, is DIY car wrapping right for you? It really depends on your skills, your patience, and your budget. Ask yourself these questions:
- Are you comfortable working with your hands?
- Do you have experience with DIY projects?
- Are you patient and detail-oriented?
- Do you have the time to dedicate to the project?
- Are you willing to invest in the necessary tools and materials?
If you answered yes to most of these questions, then DIY car wrapping might be a good fit for you. But if you're not comfortable with any of these aspects, then it's probably best to leave it to the professionals.
Exploring Different Car Wrap Finishes and Styles for DIY
One of the coolest things about car wraps is the endless possibilities for customization. You can choose from a wide range of finishes and styles to create a truly unique look. Here are some popular options:
- Gloss: A classic and shiny finish that's similar to traditional paint.
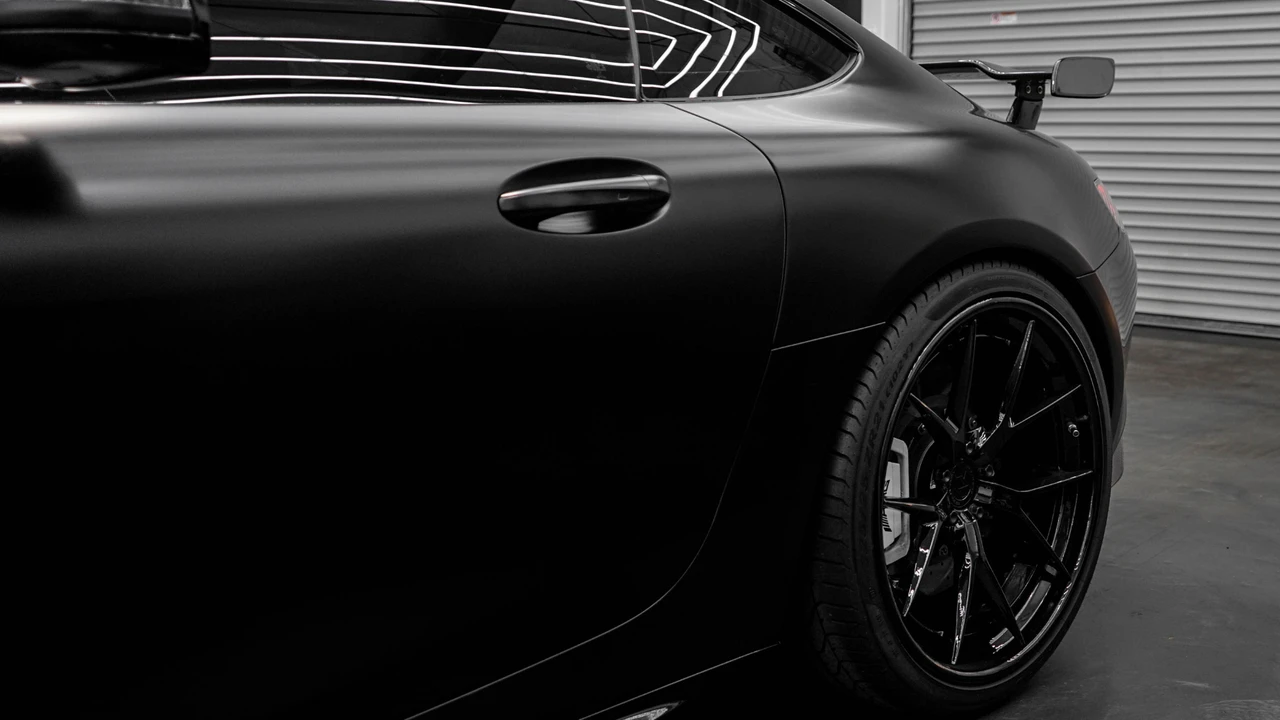
- Matte: A flat and non-reflective finish that gives your car a modern and aggressive look.
- Satin: A finish that's somewhere between gloss and matte. It has a subtle sheen that's both elegant and sporty.
- Carbon Fiber: A textured finish that mimics the look of carbon fiber. It's a popular choice for sporty cars.
- Chrome: A highly reflective finish that's sure to turn heads.
- Color Change: A wrap that changes color depending on the viewing angle.
- Printed Wraps: You can print any design or image on a car wrap. This is a great way to personalize your car or promote your business.
Inspiration: Browse online galleries and social media for inspiration. See what other people are doing with car wraps and get ideas for your own project.
DIY Car Wrapping Safety Precautions and Best Practices
Safety should always be your top priority when working on any DIY project. Here are some safety precautions to keep in mind when wrapping your car:
- Work in a Well-Ventilated Area: Car wrap adhesives can release harmful fumes.
- Wear Gloves: Protect your hands from the vinyl and cleaning solutions.
- Wear Eye Protection: Protect your eyes from splashes and debris.
- Use a Sharp Knife: A dull knife is more likely to slip and cause injury.
- Be Careful with the Heat Gun: The heat gun can get very hot and can cause burns.
- Don't Work When Tired: Fatigue can lead to mistakes and injuries.
Troubleshooting Common DIY Car Wrapping Problems
Even with the best preparation, you might run into problems during your DIY car wrap. Here's a quick guide to troubleshooting common issues:
* **Problem:** Vinyl isn't sticking. * **Solution:** Ensure the surface is clean and dry. Use a primer for better adhesion. Apply heat to activate the adhesive. * **Problem:** Air bubbles are trapped. * **Solution:** Use a pin to puncture the bubble and then smooth it out with a squeegee. * **Problem:** Vinyl is tearing. * **Solution:** Reduce the amount of stretching. Use heat to make the vinyl more pliable. * **Problem:** Wrinkles are forming. * **Solution:** Lift the vinyl and reapply, using heat to relax the material. * **Problem:** Edges are lifting. * **Solution:** Ensure edges are clean and properly heated. Use edge sealer for extra adhesion.DIY Car Wrap Removal A Step-by-Step Guide
Eventually, you might want to remove your car wrap. Here's how to do it safely:
- **Heat the Vinyl:** Use a heat gun to warm the vinyl, making the adhesive more pliable.
- **Peel the Vinyl:** Start at a corner and slowly peel the vinyl away from the car. Pull at a shallow angle to avoid damaging the paint.
- **Remove Adhesive Residue:** Use adhesive remover to clean any remaining residue from the car's surface.
- **Wash and Wax:** Wash the car and apply wax to protect the paint.
Important Note: If you're not comfortable removing the wrap yourself, it's best to have it done professionally. Improper removal can damage your car's paint.
Maintaining Your DIY Car Wrap for Longevity
Proper maintenance is crucial for extending the life of your car wrap. Here are some tips:
* **Wash Regularly:** Hand wash your car regularly to remove dirt and grime. * **Avoid Harsh Chemicals:** Use mild soap and avoid abrasive cleaners. * **Protect from Sun:** Park in the shade or use a car cover to protect the wrap from UV damage. * **Remove Contaminants:** Remove bird droppings, bugs, and tree sap immediately. * **Consider a Ceramic Coating:** A ceramic coating can protect the wrap and make it easier to clean.:max_bytes(150000):strip_icc()/277019-baked-pork-chops-with-cream-of-mushroom-soup-DDMFS-beauty-4x3-BG-7505-5762b731cf30447d9cbbbbbf387beafa.jpg)